Getting Started
Last updated on 2024-10-29 | Edit this page
Estimated time: 20 minutes
Overview
Questions
- How do I use Jupyter Notebook?
- How can I run Python code in Google Colab’s Jupyter Notebook?
Objectives
- Learners are aware of applications for Python their work environments.
- Learners can access Google Colab and work in a Colab Notebook.
- Learners are able to navigate the Colab notebook interface.
- Learners are able to write and run Python cells in a notebook.
- Learners are able to save their code as an iPython notebook (.ipynb file).
Open the collaborative doc for our workshop https://broad.io/cb-python-20240927
You’ll find all the links listed below as clickable links in the collaborative doc.
If you haven’t completed your workshop setup please visit https://broad.io/cb-python-setup
If you need help with setup, please put the pink post-it on your computer and a TA will come help you.
If you’re fully set up (ie created your colab account, downloaded the workshop data files, uploaded the files to your colab account’s google drive AND successfully run the access test), please put the green post-it on your computer and feel free to browse today’s lesson content. https:/broad.io/cb-python-20240927-lesson
To run the access test
1. visit https://broad.io/cb-python-access-test
2. click “Copy to Drive” and create your own copy of
Python_workshop_data_access_test.ipynb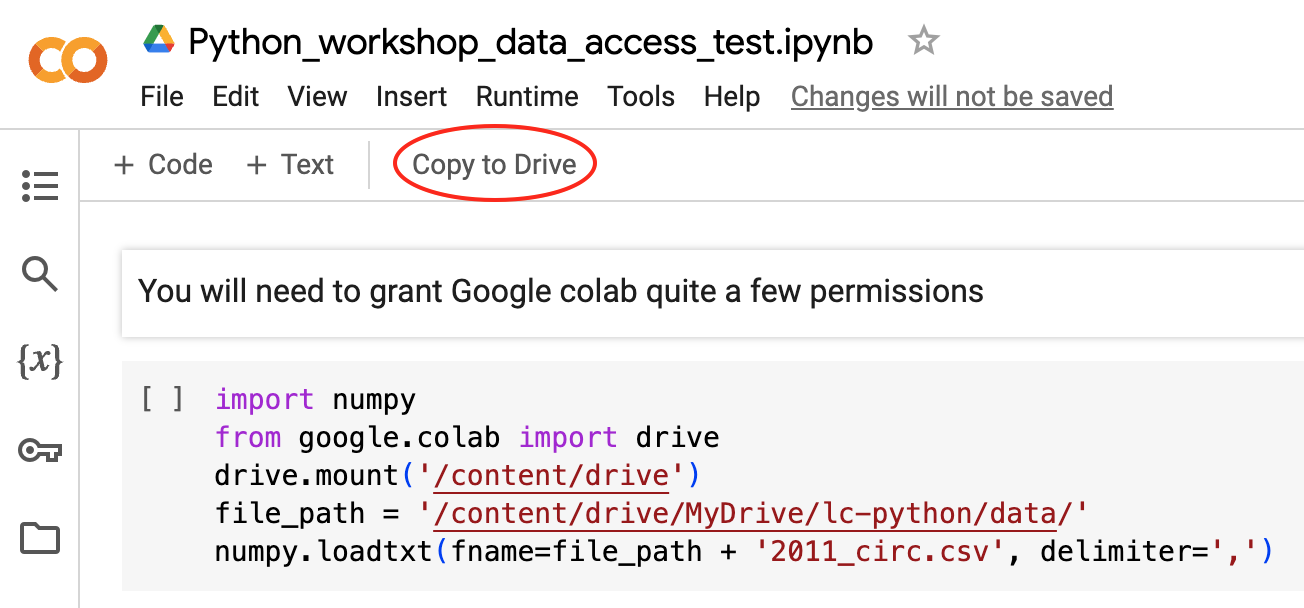
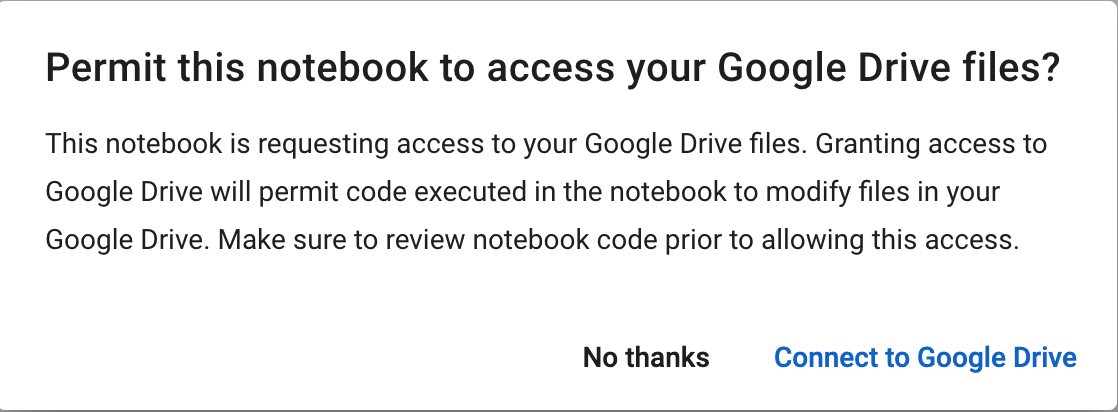
If you see this dialog box, click “Connect to Google Drive”
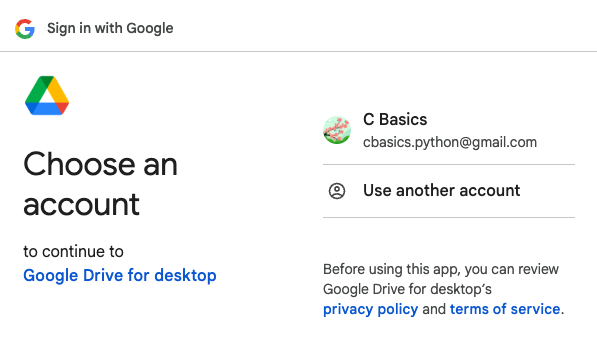
Authorize access for the google account you’re using for this workshop. There will be several prompts to grant access.
 You’ll need to grant
Google all the permissions it requests to make your google drive
accessible to Colab.
You’ll need to grant
Google all the permissions it requests to make your google drive
accessible to Colab.Once access has been granted, go back to the access test notebook, click the ▶️ symbol on the left hand side of the first code cell. You’ve successfully loaded data if you see a dataframe appear beneath the code cell
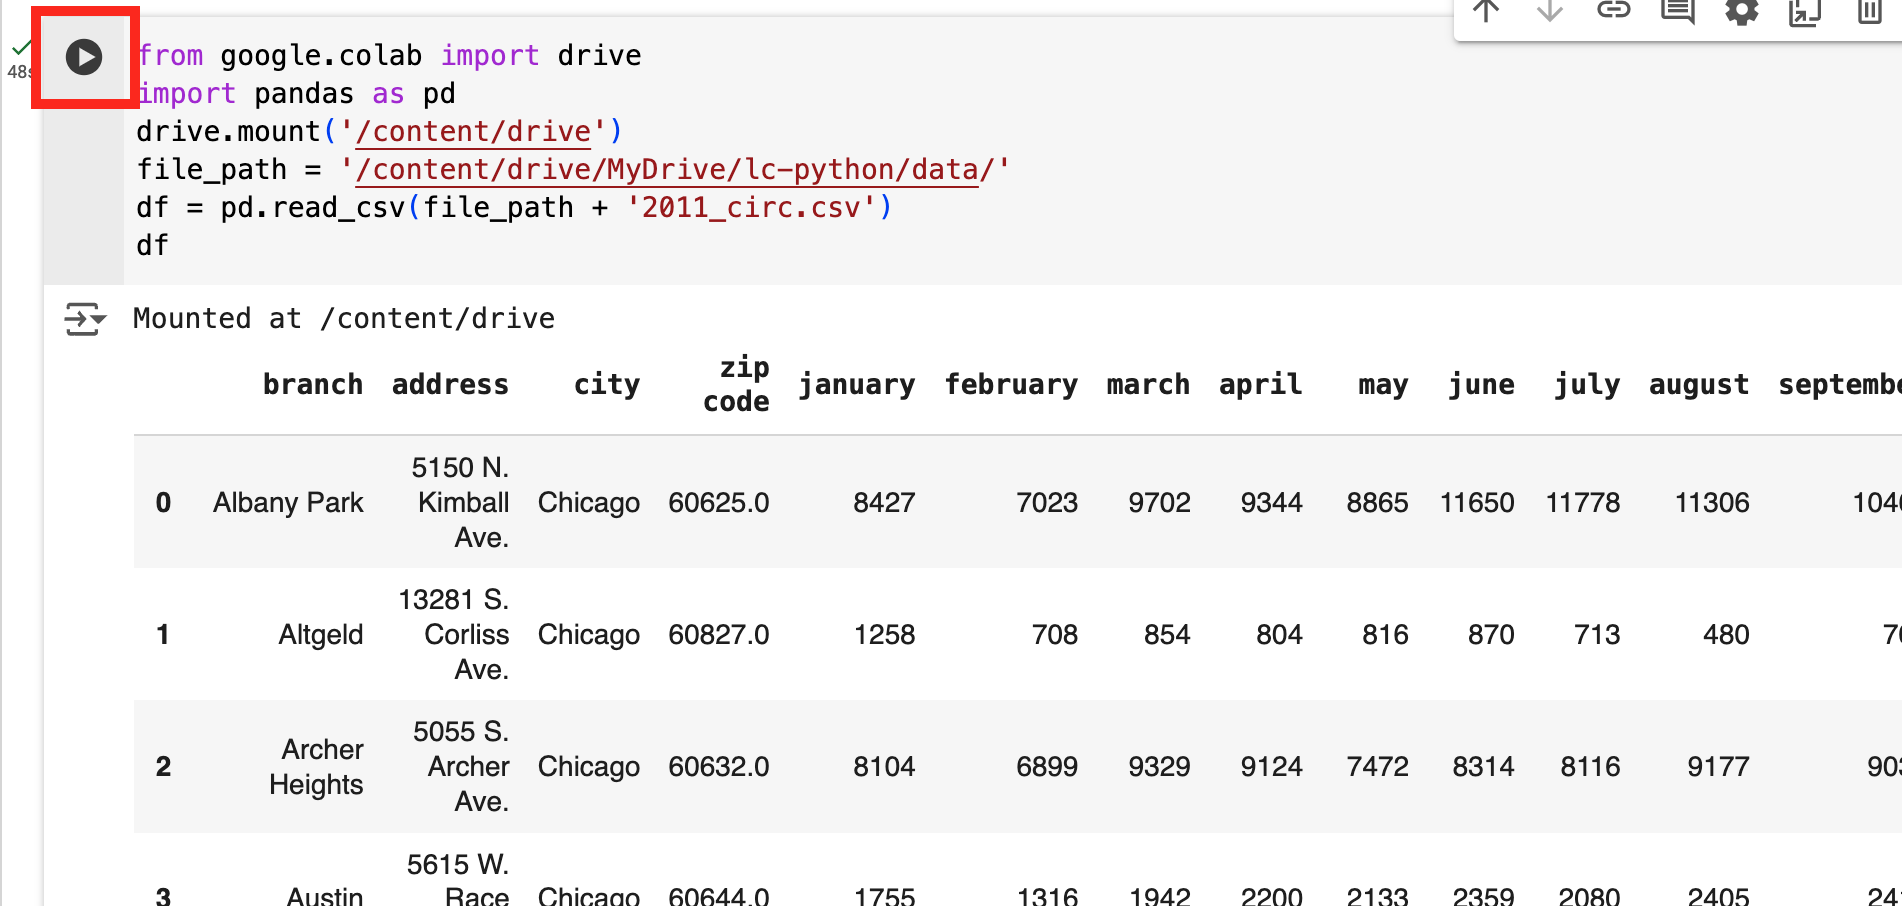
If you see loaded data beneath the code cell, feel free to browse today’s lesson content. https:/broad.io/cb-python-20240927-lesson
Why NOT Python?
Python is a popular programming language for tasks such as data collection, cleaning, and analysis. Python can help you to create reproducible workflows to accomplish repetitive tasks more efficiently.
This lesson works with a series of CSV files of circulation data from the Chicago Public Library system to demonstrate how to use Python to clean, analyze, and visualize usage data that spans over the course of multiple years.
Use Jupyter Notebook to edit and run Python code.
If you haven’t already done so, see the setup
instructions for details on preparing to use Google Colab for this
workshop. The setup instructions also walk you through the steps you
should follow to create an lc-python folder in your home
directory, to download and unzip the dataset we’ll be working with
inside of that directory and then upload it to Google Drive so it will
be accessible to Google Colab.
Getting started with Jupyter Notebook
To run Python, we are going to use Jupyter Notebooks via Google Colab. Jupyter notebooks are common tools for data science and visualization, and serve as a convenient environment for running Python code interactively where we can view and share the results of our Python code.
Alternatives to Juypter
There are other ways of editing, managing, and running Python code. Software developers often use an integrated development environment (IDE) like PyCharm, Spyder or Visual Studio Code (VS Code), to create and edit Python scripts. Others use text editors like Vim or Emacs to hand-code Python. After editing and saving Python scripts you can execute those programs within an IDE or directly on the command line.
Jupyter notebooks let us execute and view the results of our Python code immediately within the notebook. JupyterLab has several other handy features:
- You can easily type, edit, and copy and paste blocks of code.
- It allows you to annotate your code with links, different sized text, bullets, etc. to make it more accessible to you and your collaborators.
- It allows you to display figures next to the code to better explore your data and visualize the results of your analysis.
- Each notebook contains one or more cells that contain code, text, or images.
Google Colab
Google Colab is a web-based computational notebook hosted in the cloud by Google. Much like a lab notebook where a wet-lab experimentalist might have both the experimental protocol and notes on the specific experiment, a Jupyter notebook allows you to have code and notes in the same notebook.
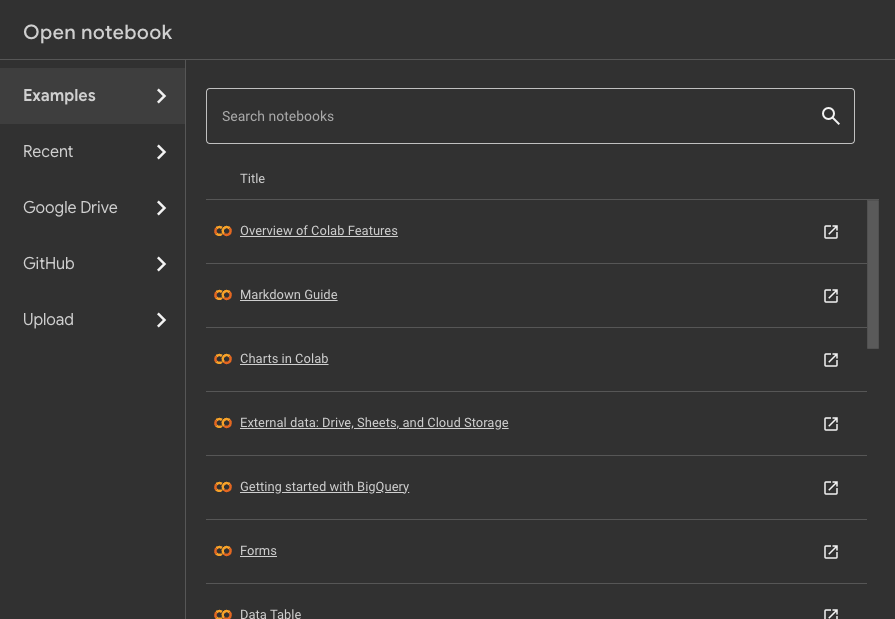
Visit https://colab.research.google.com/ and click on
Examples or, if you’re already in Colab,
File -> Open notebook. Then in the resulting window,
click on Examples.
Google offers many example notebooks:
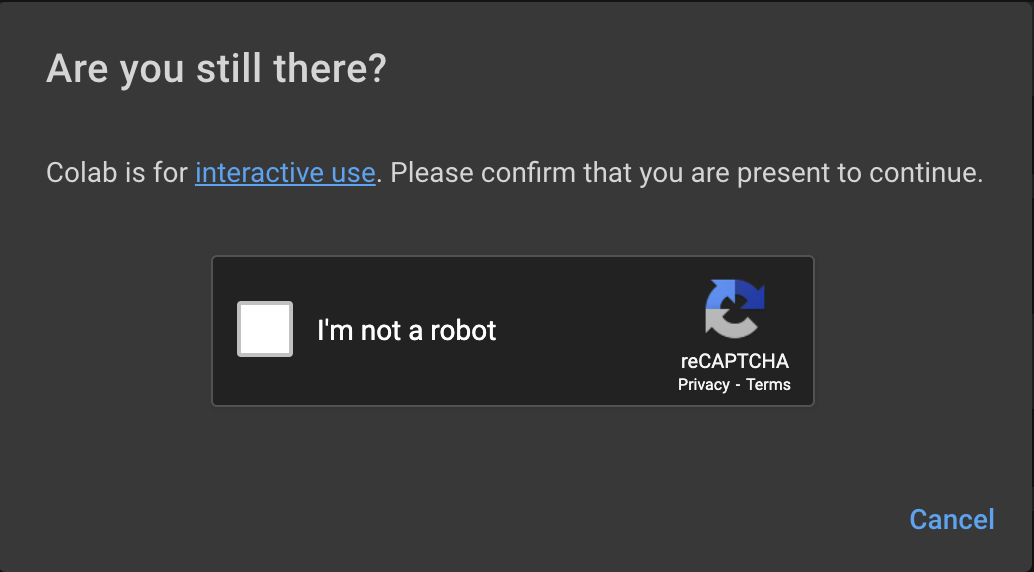
Google offers a basic colab experience for free. Hosted runtime machines consume computing resources which will be shut down if you’re not active in the notebook. If you see an “Are you still there?” window during this workshop, complete the prompt so your colab notebooks stays active.
If you see Connect or Reconnect, you’ve
been disconnected from a hosted runtime and you’ll need to reconnect.
Any work you did in the notebook is likely to be stale and you’ll need
to Runtime -> Run all (Ctrl+F9).
Creating a Juypter Notebook
You can create a Jupyter Notebook in Google Colab using your preferred web browser by visitng https://colab.research.google.com/notebooks. In the Open Notebook window, click “New notebook”.
When you first open a colab notebook, it may not be ready to execute
code. Click on Connect (circled in figure) to connect to a
hosted runtime. When you see a green checkmark, you’re all set to run
code in your notebook.

Right-click on Untitled.ipynb and edit the name of your
notebook. Let’s call the notebook file, workshop.ipynb.
Google Colab? What about JupyterLab? Python notebooks? IPython? Quarto?
JupyterLab is the next stage in the evolution of the Jupyter Notebook. If you have prior experience working with Jupyter notebooks, then you will have a good idea of how to work with JupyterLab. Jupyter was created as a spinoff of IPython in 2014, and includes interactive computing support for languages other than just Python, including R and Julia. While you’ll still see some references to Python and IPython notebooks, IPython notebooks are officially deprecated in favor of Jupyter notebooks.
Quarto also supports Jupyter Notebooks and enables easy generation of technical documents, presentations, dashboards, websites, blogs and books.
We chose Google Colab as an installation-free way for everyone to access the same coding environment. Information on options to run Python on your laptop can be found in the Colab Alternatives section under the setup instructions.
Let’s run some Python code using Google Colab.
Running Python code
Jupyter allows you to add code and formatted text in different types of blocks called cells. By default, each new cell in a Jupyter Notebook will be a “code cell” that allows you to input and run Python code. Let’s start by having Python do some arithmetic for us.
In the first cell type 7 * 3, and then press the
Shift+Return keys together to execute the contents
of the cell. (You can also run a cell by making sure your cursor is in
the cell and choosing Run > Run Selected Cells or
selecting the “Play” icon (the sideways triangle) at the top of the
noteboook.)
You should see the output appear immediately below the cell, and Jupyter will also create a new code cell for you.
If you move your cursor back to the first cell, just after the
7 * 3 code, and hit the Return key (without
shift), you should see a new line in the cell where you can add more
Python code. Let’s add another calculation to the same cell:
While Python runs both calculations Juypter will only display the output from the last line of code in a specific cell, unless you tell it to do otherwise.
Editing the notebook
You can use the icons in your notebook to edit the cells in your Notebook:
- The
+ Codeand+ Texticons adds a new cell below the selected cell. - Delete the current cell by clicking the trash icon in the floating icon bar above the right hand side of the current cell.
You can move cells around in your notebook by using the arrow icons in the floating icon bar above the right hand side of the current cell.
Colab keyboard shortcuts use CMD ⌘ (on a Mac) or CTRL (on Windows) key together with the m key to activate a keyboard shortcut.
CMD/CTRL M + h show a list of keyboard shortcut options
CMD/CTRL M + a insert code cell above
CMD/CTRL M + b insert code cell below
CMD/CTRL M + m convert cell to markdown cell
CMD/CTRL M + y convert cell to code cell
:::::::::::::::::::::::::::::::::::::::::: spoiler
About keyboard shortcuts for Mac
In Colab, Macs can use Ctrl+F9 OR ⌘+F9. In other Jupyter notebook environments, Ctrl+F9 may not be an option for Mac. For the rest of this workshop, we’ll use indicate Ctrl+<keystroke> for simplicity. Mac users should keep in mind that using Command (⌘) in lieu of Ctrl is an option.
::::::::::::::::::::::::::::::::::::::::::::::::::
Markdown
Instructors: Since the lesson is focused on Python we don’t include any Markdown examples here. If you want to teach Markdown, note that it will slow down the lesson.
You can add text to a Juypter notebook by selecting a cell, and
changing the cell from Code to Markdown. In
Colab, select the cell, then use the keyboard shortcut CMD/CTRL M + y.
You can also add a new text cell by selecting “Text” instead of “Code”
in the Colab browser interface when you add a new cell. Markdown is a
lightweight language for formatting text. This feature allows you to
annotate your code, add headers, and write documentation to help explain
the code. While we won’t cover Markdown in this lesson, there are many
helpful online guides out there: - Markdown
for Jupyter Cheatsheet (IBM) - Markdown Guide (Matt Cone)
Key Points
- You can run a cloud based Jupyter Notebook with a Google account and a web browser.
- You can use a Jupyter notebook to edit and run Python.
- Notebooks can include both code and markdown (text) cells.